NDJ 30003 - ELECTRONIC INSTRUMENTATION
LAB 3 - Blynk Application
Name: ONG JUN JIE
Matrix No.: 192020315
Program: Computer Engineering
Date: 14/10/2021
OBJECTIVES
- build a simple application with Blynk
EQUIPMENTS/COMPONENTS
- ESP32 DOIT DEVKIT V1 BOARD
- Traffic Light LED Module
- 10kΩ resistor
- Push Button Module
- Breadboard
- Jumper Wires
-Potentiometer
-LM-35
-LDR
-Blynk Application
INTRODUCTION
ESP32 is a feature-rich MCU with integrated Wi-Fi and Bluetooth connectivity for a wide-range of applications. ESP32 can perform as a complete standalone system or as a slave device to a host MCU, reducing communication stack overhead on the main application processor. ESP32 can interface with other systems to provide Wi-Fi and Bluetooth functionality through its SPI/SDIO or I2C/UART interfaces. The Wi-Fi speeds of ESP32 can be as high as 150 Mbps, which makes it a perfect accessory for IoT projects in wearable electronics, smartphone devices, and along with other boards such as Arduino.
Blynk is a platform with IOS and Android apps to control Arduino, Raspberry Pi and the likes over the internet. It's a digital dashboard where you can build a graphic interface for your project by simply dragging and dropping widgets.
In this lab, I am going to explore the features of ESP32 and Bylnk application. I am try to do some project such as monitoring LUX and LEDs, control the LEDs in Blynk through Arduino and ESP32.
-------------------------------------------------------------------------------------------------------------------------------------------------------------------------
LAB MODULE 3:
Blynk Application:
Example of simple application:
The components should be set up like this in breadboard and ESP32.
Coding in Arduino:
Output in circuit:
The Blynk application connect with LED module and control the output of LED.
Surrounding temperature and light intensity detect by LM-35 and LDR.
I am adjusting the potentiometer and the value is display in Blynk.
After pressing the switch module, the red LED light in Blynk.
Task of the day:
Create simple application that integrate between sensors, input, output, and Blynk app.
1. Convert raw ADC value to LUX
2. Based on the LUX value:
a. If high - only on the green is on
b. If medium - only on the yellow is on
c. Else - only on the red is on
3. The LUX value and LEDs can be monitored at Blynk app
4. In Blynk app also has a button that can manually turn on/off LED on ESP32 (pin 2)
Component Set Up:
The components should be set up like this in breadboard and ESP32.
Full Coding in Arduino:


Output in circuit:
The LED turn on/off follow the LUX value. When LUX value too high, green LED turn on; When LUX value is medium, yellow LED turn on; When LUX value is low, red LED turn on. LUX value can be monitor in Blynk App.
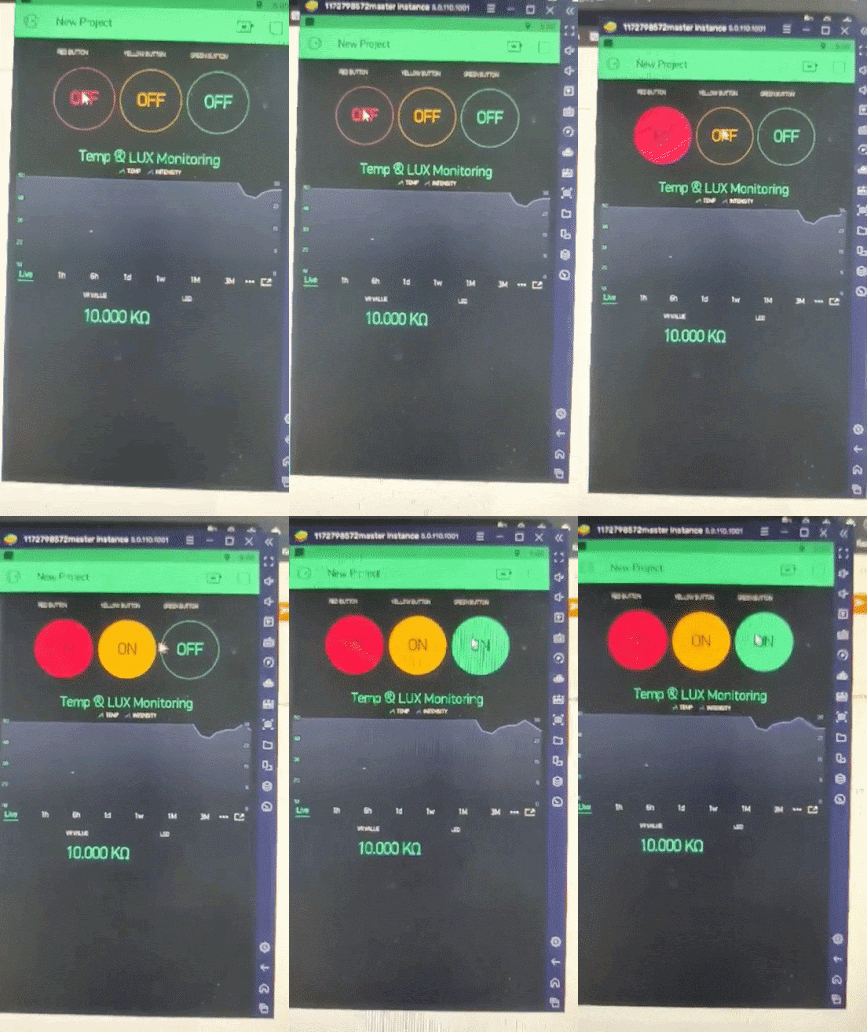
Blynk app have 3 different button controlling the red LED, yellow LED and green LED and LED can be monitor in Blynk app.
Conclusion In the conclusion, I had learnt the features and usage of Arduino and Blynk Application. The Blynk app is really an app editor. It allows create one or more projects. Each project can contain graphical widgets, like virtual LEDs, buttons, value displays and even a text terminal, and can interact with one or more devices. The iOS and Android application are very polished and easy to use. From the task of the day project, Blynk can easily control the output of LED and monitoring the value of LUX and LEDs output by simply adding some related widgets with it. However, Blynk has a pay-as-you-go scheme called Blynk Energy. Basically, creating a new project and using widgets consumes energy units, which are partially returned when the project is deleted and the widgets removed. This might trouble some poor students when building an application.
LAB 3 END

LET'S MAKE A LITTLE BIT PROGRESS EVERY DAY AND YOU SEE
THE POWER OF SMALL CHANGES


No comments:
Post a Comment